We independently curate & test every recommendation. If you buy/click through our links, we may earn a commission.
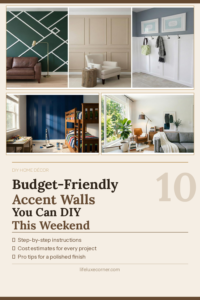
Budget-Friendly Accent Walls: 10 DIY Ideas to Transform Your Space This Weekend
Want to dramatically change a room without spending thousands on a full renovation? A well-executed accent wall is one of the highest-impact, lowest-cost home upgrades you can make. Whether you’re a beginner or a seasoned home decorator, these 10 budget-friendly accent wall ideas will help you create a jaw-dropping focal point — no professional needed.
In this guide, you’ll find detailed step-by-step how-to instructions for every project, a materials list, cost estimates, and pro tips to get a polished, professional result every time.
Why Budget-Friendly Accent Walls Are Worth It
Accent walls are a designer-approved trick for a reason — they work. Here’s what a single statement wall can do for your space:
• Boost aesthetics instantly: Elevate the entire feel of a room without touching anything else.
• Define open-plan spaces: Use them to visually separate zones in open layouts.
• Express your personality: Your walls are a canvas — use them.
• Maximize budget impact: Often costs a fraction of redecorating an entire room.
• Increase home value perception: Thoughtful design details make spaces feel more premium.
At a Glance: Which Accent Wall Is Right for You?
Before diving in, here’s a quick comparison to help you choose the best idea for your skill level and budget:
- Beginner + Lowest Cost: Simple Block Color, Half-Painted Wall, Striped Wall
- Beginner + Renter-Friendly: Peel and Stick Wallpaper
- Intermediate: Geometric Paint Design, Picture Frame Molding, Wood Slat Wall
- Intermediate to Advanced: Batten Board Wall, Shiplap, DIY Brick Veneer
1. Classic Batten Board Accent Wall
Best for: Farmhouse, traditional, transitional, and modern styles
Estimated Cost: $50–$150
First and foremost, batten board walls add timeless architectural character that looks like it was built into the home. The structured grid of vertical and horizontal boards creates visual interest that photography and paint alone can’t replicate.
How to Create a Batten Board Accent Wall
Materials you’ll need:
- MDF or pine boards (1×2 or 1×3)
- Wood glue, brad nailer and brad nails
- Level, measuring tape, caulk, paint
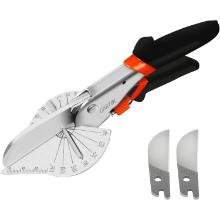
- Miter saw (optional but recommended)
Step-by-step instructions:
- Plan your layout. Sketch your batten pattern on paper first. Standard spacing is 12–16 inches between vertical battens. Decide whether you want a full-wall grid or upper/lower sections.
- Cut your boards. Measure the wall height and width. Cut top and bottom horizontal rails first, then cut vertical battens to fit between them. Cut all pieces before you start nailing.
- Attach horizontal rails. Apply a bead of wood glue and press the top horizontal rail into position, checking with your level. Secure with brad nails. Repeat for the bottom rail.
- Add vertical battens. Starting from one end, glue and nail each vertical batten at your planned intervals, using a level each time. A speed square helps keep them perfectly perpendicular.
- Fill, caulk, and paint. Fill nail holes with wood filler. Let dry and sand smooth. Caulk all seams between battens and the wall. Prime, then paint in your chosen color (white and soft neutrals are perennial favorites).
Pro tip: Paint the wall behind where your battens will go before installing — it’s much harder to cut in neatly around them afterward.
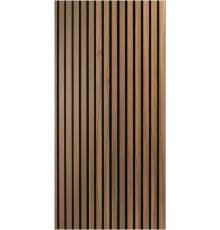
2. Modern Wood Slat Accent Wall
Best for: Scandinavian, minimalist, mid-century modern
Estimated Cost: $60–$200
Wood slat walls have dominated interior design trends for years — and for good reason. They add warmth, texture, and dimension that instantly upgrades any room. Slat walls work especially well behind TV units, beds, and sofas.
How to Build a Wood Slat Accent Wall
Materials you’ll need:
- Thin wood strips (furring strips, pine lattice, or ripped plywood)
- Construction adhesive or wood glue
- Brad nailer (optional), level, measuring tape, saw
- Stain, paint, or clear sealer
Step-by-step instructions:
- Prep and finish your slats. Sand any rough edges. Apply stain, paint, or sealer before installation — it’s much faster to finish them flat than on the wall. Allow to dry fully.
- Plan your spacing. Cut a small spacer block from scrap wood at your desired gap width (0.5″–1″ is common). This ensures perfectly even gaps every time without measuring each slat.
- Start from a reference point. Begin at one side of the wall or at a center point, working outward. Use your level to confirm the first slat is plumb — every slat after depends on it.
- Apply adhesive and attach. Run a zigzag bead of construction adhesive on the back of the slat. Press firmly onto the wall, hold for 30 seconds, then secure with brad nails for extra grip. Use spacer block to position the next slat.
- Repeat and trim final pieces. Work your way across the wall. The final slat may need to be ripped down on a table saw to fit. Touch up any gaps or imperfections.
Pro tip: Paint the wall black or dark gray behind the slats — the contrast through the gaps adds incredible depth.
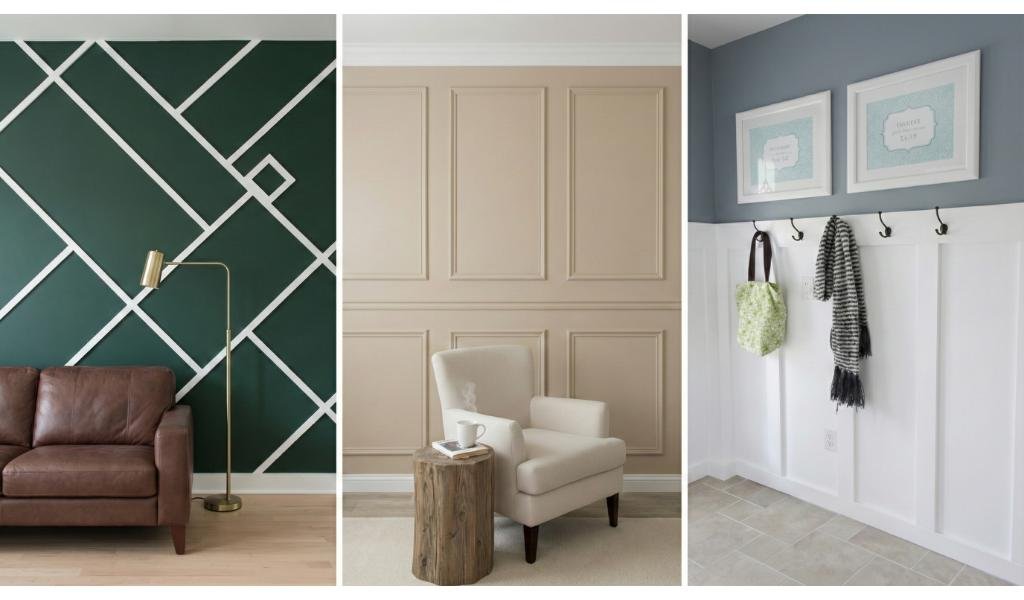
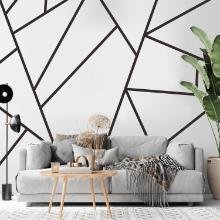
3. Geometric Paint Accent Wall
Best for: Contemporary, eclectic, bold statement spaces
Estimated Cost: $30–$80
A geometric painted accent wall is pure, expressive design that costs very little. Triangles, chevrons, diamonds, hexagons — the possibilities are endless, and the only limit is your imagination. This is also a great way to use up leftover paint.
How to Paint a Geometric Accent Wall
Materials you’ll need:
- High-quality painter’s tape (FrogTape is best for crisp lines)
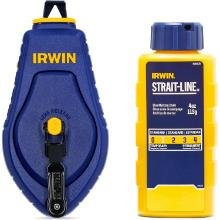
- Pencil, level or ruler, chalk line
- Paint in 2–4 colors, paintbrushes and rollers
Step-by-step instructions:
- Choose and sketch your design. Draw your geometric pattern to scale on paper first. Simple designs — like a large triangle, a bold diamond, or a mountain range — are often the most striking. Keep it achievable for your first attempt.
- Transfer to the wall. Use your level and pencil to lightly draw the geometric shapes directly onto the wall. A chalk line is useful for long straight lines. Double-check all angles and measurements.
- Apply painter’s tape precisely. Press tape firmly along your pencil lines. Run a fingernail along all tape edges to seal them and prevent bleeding. Number each section with a small sticky note to track which color goes where.
- Paint each section. Apply two coats per section, allowing each to dry completely before adding the second. Start with lighter colors and work toward darker ones.
- Remove tape and touch up. Pull tape off at a 45-degree angle while paint is still slightly wet. This prevents peeling dried paint. Use a fine artist’s brush to touch up any bleeds once dry.
Pro tip: Seal the tape edge with a thin coat of your base color first — this fills any tiny gaps and guarantees laser-sharp lines.
4. Bold Single Color Block Wall
Best for: Any style, especially beginner DIYers
Estimated Cost: $20–$50
Never underestimate the power of a single, confident color. A bold block of color on one wall is one of the most effective and affordable design moves in the book — designers call it ‘color blocking’ and it’s a foundational technique in interior design.
How to Paint a Bold Color Block Accent Wall
Materials you’ll need:
- Painter’s tape, paint roller and tray
- Angled paintbrush for cutting in, drop cloths
- Interior wall paint in your chosen color (1 quart usually covers a standard accent wall)
Step-by-step instructions:
- Prep the wall. Wipe the wall with a damp cloth to remove dust and oils. Fill any holes with spackling compound. Sand smooth when dry. A clean wall ensures the best paint adhesion.
- Tape off all edges. Apply painter’s tape along the ceiling, baseboards, and edges where this wall meets adjacent walls. Press the tape edge down firmly to prevent bleed.
- Roll the main surface. Load your roller with paint and apply in a W-pattern across the wall, then fill in without lifting the roller. Apply 2–3 coats, allowing proper drying time between each.
- Remove tape and admire. Remove the tape at a 45-degree angle while the last coat is still slightly wet. Stand back and enjoy!
Pro tip: Sample your color on a large piece of poster board first and observe it at different times of day — paint colors look dramatically different in morning vs. evening light.

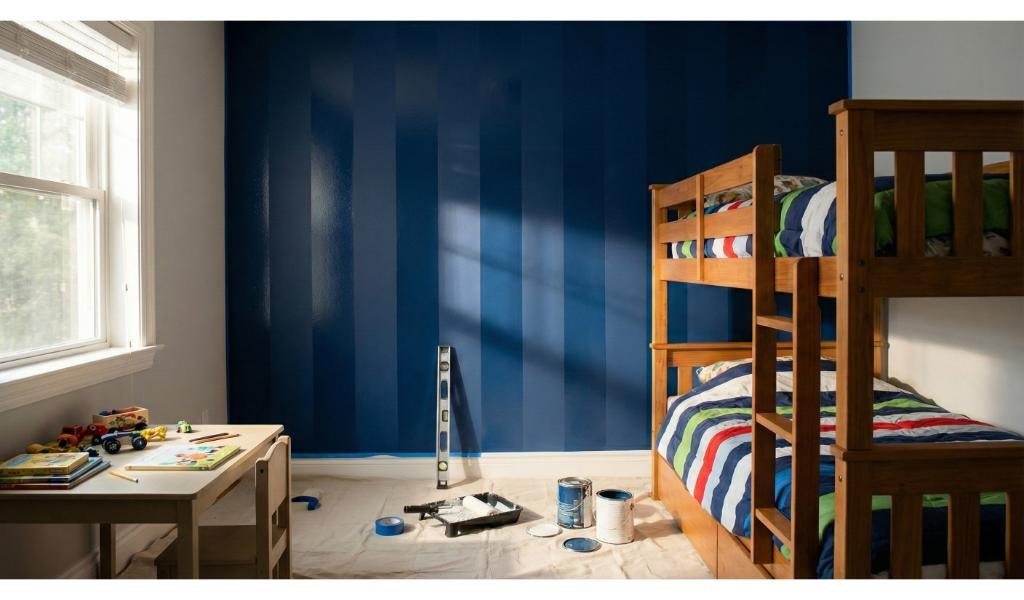
5. Striped Statement Wall
Best for: Kids’ rooms, playful spaces, making rooms feel taller or wider
Estimated Cost: $25–$60
Stripes are a classic for a reason — they’re versatile, graphic, and can visually reshape a room. Vertical stripes draw the eye upward and make ceilings feel higher. Horizontal stripes add width to narrow rooms. Wide stripes feel bold and modern; thin stripes are more refined.
How to Paint Stripes on an Accent Wall
Materials you’ll need:
- Painter’s tape, level, measuring tape, pencil
- 2 paint colors (or 1 color over your existing wall for tonal stripes)
- Paint rollers, small brushes
Step-by-step instructions:
- Paint the base coat. Apply your lighter color across the entire wall and let it dry for at least 24 hours. A fully cured base coat prevents the tape from lifting it when removed.
- Calculate your stripe widths. Measure the wall’s total height (or width for horizontal stripes). Decide how many stripes you want and divide evenly. Odd numbers of stripes tend to look most balanced.
- Mark and apply tape. Use your level and pencil to lightly mark each stripe line. Apply painter’s tape on the outer edge of lines that will be your second color — tape goes on the side that stays the base color.
- Seal the tape edge. Lightly brush the base color along the tape edge first. This seals any gaps so your second color won’t bleed underneath.
- Paint and reveal. Apply 2 coats of your second color. While the final coat is still slightly wet, remove the tape slowly at a 45-degree angle.
Pro tip: For a luxe high-gloss/matte stripe effect, use the same color but alternate between eggshell and semi-gloss finishes. The stripes are subtle and incredibly chic.
6. Elegant Picture Frame Molding Wall
Best for: Traditional, transitional, formal dining rooms and entryways
Estimated Cost: $60–$150
Picture frame molding transforms a flat wall into something that looks like it belongs in an upscale historic home. It’s one of the most classic architectural detail tricks designers use — and it works in virtually any style from colonial to contemporary.
How to Install Picture Frame Molding
Materials you’ll need:
- Pre-primed trim molding (chair rail or decorative molding profiles)
- Miter saw or miter box, wood glue, brad nailer
- Level, measuring tape, caulk, wood filler, paint
Step-by-step instructions:
- Plan your layout with painter’s tape. Stick painter’s tape directly on the wall in your intended frame positions. Step back and evaluate — adjust for proportions and spacing before cutting any wood. Frames should be proportional to wall height.
- Cut mitered corners. Each frame requires 4 pieces with 45-degree mitered corners. Measure the inside dimension of each piece carefully and cut. Test-fit all pieces on a flat surface before gluing.
- Attach each frame. Apply wood glue to the back, press onto the wall, and secure with brad nails at each corner and every 8–10 inches along longer sides. Check level constantly.
- Fill, caulk, and sand. Fill all nail holes with wood filler. When dry, sand smooth. Caulk every seam where molding meets the wall — this is the step that separates amateur from professional results.
- Paint the entire wall. Roll the wall (including the molding frames) in one unified color. White or soft neutrals create a classic look; deeper tones create drama.
Pro tip: Pre-prime your molding before installation to seal the wood and ensure even paint absorption. Pre-primed molding saves this step.
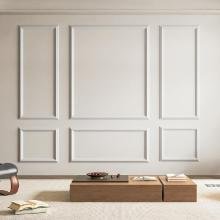
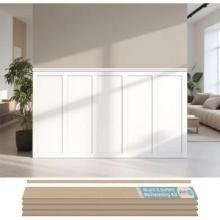
Picture Frame Wall Molding Panel Kit
Instant high-end panelled walls — no contractor needed. Just glue, paint, and one afternoon.
7. Half-Painted Two-Tone Wall
Best for: Bedrooms, living rooms, modern and minimal spaces
Estimated Cost: $20–$60
The two-tone or half-painted wall is one of the most trendy, sophisticated, and achievable DIY accent wall techniques right now. It’s endlessly versatile — paint the bottom half, the top half, or experiment with angled dividing lines for a more dynamic effect.
How to Paint a Half-and-Half Accent Wall
Materials you’ll need:
- Painter’s tape, level, measuring tape, pencil
- Paint in your chosen color(s), rollers and angled brush
Step-by-step instructions:
- Decide on your dividing line height. The most common choices are one-third height (chair rail height, about 32–36 inches), two-thirds, or a bold 50/50 split. Each creates a very different visual effect.
- Mark and tape your line. Use your level and pencil to draw a perfectly horizontal guideline all the way across the wall. Apply painter’s tape precisely on this line.
- Paint your section. Cut in along the tape edge first, then roll the rest. Apply 2–3 coats for full coverage.
- Remove tape while wet. Pull the tape off at a 45-degree angle while the final coat is still slightly tacky. This gives you the sharpest possible line.
- Optional: Add a trim element. Some homeowners add a thin strip of wooden molding or beading right along the color divide line — it adds an architectural detail and hides any imperfections.
Pro tip: Try painting the lower portion in a darker, deeper shade — this grounds the room and makes the space feel more intentional and designed.
8. Peel and Stick Wallpaper Feature Wall
Best for: Renters, commitment-phobes, kids’ rooms
Estimated Cost: $40–$150
Peel and stick wallpaper has revolutionized home decorating for renters and homeowners alike. Today’s options look indistinguishable from traditional wallpaper — with designs ranging from subtle textures to bold botanicals to faux marble and more. And it comes off cleanly when you’re ready for a change.
How to Apply Peel and Stick Wallpaper
Materials you’ll need:
- Peel and stick wallpaper (measure your wall — add 10% for pattern matching)
- Smoothing tool or credit card, utility knife, level
- Measuring tape, pencil
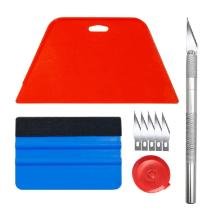
Peel & Stick Wallpaper Application Tool Kit
Everything you need for a smooth, bubble-free accent wall install — all in one handy kit!
Step-by-step instructions:
- Prep the wall thoroughly. Clean with a sugar soap solution to remove all grease and dust. Fill any holes. Allow to dry completely — at least 24 hours. Peel and stick wallpaper requires a smooth, clean surface to adhere properly.
- Mark a plumb vertical line. Use your level to draw a perfectly vertical starting line on one edge of the wall. This is more reliable than using the corner as your guide, which may not be truly vertical.
- Cut and hang your first strip. Measure and cut your first strip, leaving 2–3 inches extra at the top and bottom for trimming. Starting at the ceiling, peel back 6–8 inches of backing. Align with your plumb line and smooth downward, peeling backing as you go.
- Smooth out bubbles as you go. Use your smoothing tool to push air bubbles toward the edges. Work systematically — don’t smooth the entire strip at once. If a bubble forms, peel that section back and reapply.
- Match and repeat. Before peeling the backing of each subsequent strip, line it up alongside the previous one to match the pattern. Then apply.
- Trim with a utility knife. Use a straight edge and utility knife to trim at ceiling, baseboards, and around outlets. For a perfect edge, score multiple times rather than pressing too hard in one pass.
Pro tip: Warm up the wallpaper with a hair dryer on low heat to improve adhesion — especially useful in cooler climates.
9. Shiplap Accent Wall
Best for: Farmhouse, coastal, rustic and transitional styles
Estimated Cost: $80–$120
Made famous by renovation shows and magazines, shiplap is the horizontal plank wall treatment that adds instant warmth and character. The overlapping plank design creates beautiful shadow lines that change appearance as the light shifts throughout the day.
How to Install a Shiplap Accent Wall
Materials you’ll need:
- Shiplap boards (or DIY using plywood ripped into strips)
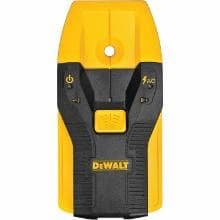
- Nail gun and finish nails (to hit studs), stud finder
- Level, saw, caulk, paint or stain
Step-by-step instructions:
- Locate and mark studs. Use a stud finder to mark all studs on the wall with tape. Shiplap must be nailed into studs for proper support — drywall anchors alone won’t hold over time.
- Pre-finish your boards. Paint or stain boards before installation. It’s much faster and easier to finish them flat, and you’ll get better coverage. Allow to fully dry.
- Start at the bottom. Begin at the baseboard and work upward. Your first board sets the baseline for every row above — check it for level before nailing.
- Nail through the tongue or face. Nail each board into the studs. If using traditional shiplap with a groove, nail at a 45-degree angle through the tongue (blind nailing) for a cleaner look. Otherwise, face-nail and fill holes.
- Maintain consistent gaps. Use a nickel or penny as a spacer between each row for consistent shadow line gaps. This is the signature detail that makes shiplap look professional.
- Cut around obstacles. Use a jigsaw for outlets and switches. Turn off the power before cutting around electrical boxes.
Pro tip: White-painted shiplap is timeless, but try navy, forest green, or natural wood tones for a more dramatic contemporary look.
10. Faux Brick Veneer Accent Wall
Best for: Industrial loft, rustic, eclectic spaces
Estimated Cost: $80–$200
A faux brick accent wall brings texture, depth, and serious personality to a space. Lightweight brick veneer panels look remarkably authentic but weigh a fraction of real brick — making them a practical DIY option for interior walls.
How to Install a Faux Brick Veneer Accent Wall
Materials you’ll need:
- Faux brick veneer panels or individual brick slips
- Construction adhesive, level, measuring tape
- Utility knife or wet saw, grout (optional), sealant
Step-by-step instructions:
- Choose your product. Faux brick veneer comes in panel form (large sheets that install quickly) or individual brick slips (more authentic look but more time-intensive). Panels are best for beginners.
- Prep and plan. Measure the wall and calculate how many panels you need. Dry-fit panels on the floor first to plan cuts and ensure pattern staggering looks natural.
- Apply adhesive and install. Apply construction adhesive in a zigzag pattern on the back of the first panel. Press firmly to the wall, starting from a bottom corner. Use a level to confirm it’s straight.
- Continue across the wall. Stagger each row’s starting point by half a brick width for an authentic running bond pattern. Cut panels with a utility knife or wet saw as needed.
- Grout and seal. Apply unsanded grout between bricks using a grout bag, then wipe off excess with a damp sponge. Once dry, apply a brick sealant to protect the surface and enhance the natural appearance.
Pro tip: For a more modern look, whitewash the brick with a 50/50 mix of white paint and water after installation — it softens the look while keeping all the texture.
Frequently Asked Questions About DIY Accent Walls
Which wall should be the accent wall?
Choose the first wall you see when entering the room, or the wall behind the main furniture piece (bed, sofa, fireplace). Avoid walls with too many windows or doors, as they interrupt the visual impact.
How much does a DIY accent wall cost?
Painted accent walls start at $20–$50. Peel and stick wallpaper ranges $40–$150. Wood slat and batten walls typically run $60–$250 depending on materials. Shiplap and brick veneer are at the higher end at $80–$250+.
Can renters do DIY accent walls?
Yes! Peel and stick wallpaper is the most renter-friendly option — it removes cleanly without damaging walls. Command strips can also be used for lightweight wood elements. Always check your lease first.
How long does an accent wall take to complete?
Simple paint accent walls take 2–4 hours (plus drying time). Peel and stick wallpaper takes 1–3 hours. Wood slat, batten, and shiplap installations typically take a full day or a weekend.
Do I need special tools?
A level, measuring tape, and painter’s tape are essential for almost every project. A brad nailer speeds up wood installations significantly. Most tools can be rented from home improvement stores if you don’t want to buy.
Ready to Try These Budget-Friendly Accent Walls?
From a simple coat of bold paint to architectural wood slat walls, there’s a DIY accent wall idea here for every budget, every skill level, and every style. The key is to start — you’ll be amazed by what a single wall can do for an entire room.
Browse our curated product picks below for all the materials and tools you’ll need to get started, and don’t forget to share your finished accent wall with us — we’d love to see your transformation!